This guide provides a straightforward approach to setting up a Node.js project with TypeScript, without the need for complex configurations. By taking advantage of the latest Node.js features like watch mode, the built-in test runner, and the assert library, this setup minimizes dependencies while ensuring a smooth and efficient development experience. Follow step-by-step instructions to initialize your project, integrate TypeScript, set up Git, and add testing capabilities. In this guide I wanted to minimize to depencencies you install and the configuration files you have to add in your project. If you are not doing Frontend you can go very far with a very simple scaffolding.
TLDR
for the more impatients, just here is the source code. Just go there and follow the README.
Scaffolding a Node.js Project with TypeScript with No Configuration
Creating a Node.js project with TypeScript without the hassle of complex configurations can be streamlined with the following steps. This guide walks you through setting up a boilerplate project that includes TypeScript support, automatic type checking, and testing.
Prerequisites
Before we start, install fnm (Fast Node Manager) and use it to install Node.js version 20:
fnm install v20.15.1Initialize the Node.js Project
-
Create a new directory for your project and navigate into it:
mkdir boilerplate_node_typescript cd boilerplate_node_typescript -
Initialize a new Node.js project:
npm init -
(Optional) If you are using
fnmornvm, set the Node.js version for the project:node -v > .nvmrcNow, every time you navigate into the project directory, the Node.js version will be set automatically.
Set Up Git
-
Initialize a new Git repository:
git init -
Create a
.gitignorefile:touch .gitignore -
Add the following lines to
.gitignoreto exclude thenode_modulesanddistdirectories:node_modules/* dist/*
Install TypeScript
-
Install TypeScript and
tsx(a tool for running TypeScript files directly):npm i -D typescript tsx -
Create a
srcdirectory and an entry file:mkdir src touch src/index.ts
Update package.json
Add the following scripts to your package.json file:
{
  "main": "dist/index.js",
  "scripts": {
    "dev": "node --import=tsx --watch --no-warnings src/index.ts",
    "build": "tsc src/index.ts --outDir dist",
    "typecheck": "tsc src/index.ts --noEmit",
    "typecheck:watch": "tsc src/index.ts --noEmit --watch",
    "start": "node dist/index.js"
  }
}
Add Some Code
-
Create a
sum.tsfile:touch src/sum.ts -
Add the following code to
src/sum.ts:export function sum(a: number, b: number): number { return a + b; } -
Update
src/index.tsto use thesumfunction:import { sum } from './sum'; console.log(sum(1, 2)); -
Run the development script to see your code in action:
npm run devThis script will watch for changes and reload automatically.
-
You can also build and start the project:
npm run build
npm start
Add Type Checking
While tsx is great for development, it doesn’t report type errors. Use TypeScript’s tsc for type checking:
-
Add a typecheck script to
package.json(already added above):"scripts": { "typecheck": "tsc src/index.ts --noEmit", "typecheck:watch": "tsc src/index.ts --noEmit --watch" } -
Run the type checking script:
npm run typecheck
Add Tests
-
Install
@types/nodefor TypeScript support in Node.js:npm i -D @types/node -
Create a test file:
touch src/sum.test.ts -
Add the following code to
src/sum.test.ts:import { sum } from './sum'; import { test } from 'node:test'; import { strictEqual } from 'node:assert'; test('sum(1, 2) equals 3', () => { strictEqual(sum(1, 2), 3); }); -
Add test scripts to
package.json:"scripts": { "test": "node --import=tsx --test src/**/*.test.ts", "test:watch": "node --import=tsx --test --watch src/**/*.test.ts" } -
Run the tests:
npm test
Work in a Reactive Environment
For an efficient development workflow, open three terminals and run:
-
Terminal 1: Development mode
npm run dev -
Terminal 2: Type checking
npm run typecheck:watch -
Terminal 3: Testing
npm run test:watch
You are done! This setup provides a simple and effective way to scaffold a Node.js project with TypeScript without any complex configuration. Enjoy coding!
Bonus: adding test coverage.
We can use tools like nyc to make our life much easier.
install nyc:
npm i -D nycthen modify the package.json like this:
package.json
scripts: {
    ...
    "test": "nyc --reporter=html --reporter=text node  --import=tsx --test src/**/*.test.ts",
    ...,
    "coverage": "nyc report --reporter=text --reporter=text-summary",
    "coverage:html": "npx http-server coverage"
}
add to your .gitignore the following:
...
.nyc_output/*
coverage/*
now, if you run npm test, you will see some new information after the test run:

After you have runned the test, you will be able to print any time you want several report.
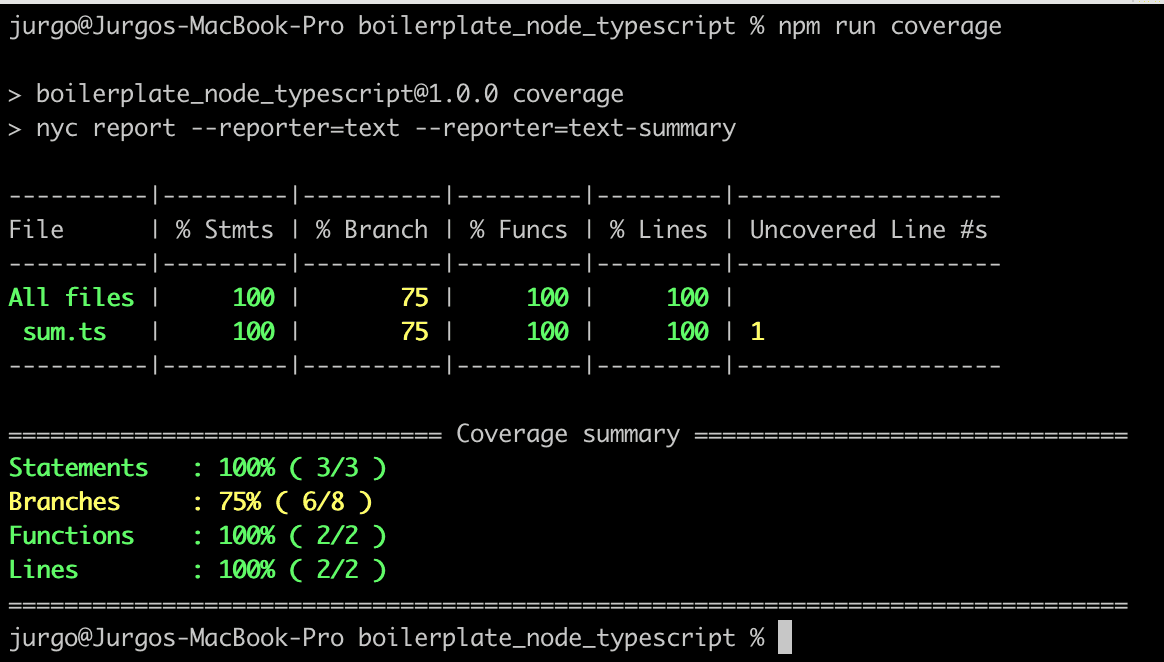
to run a text based report just run:
npm run coverageyou will see:
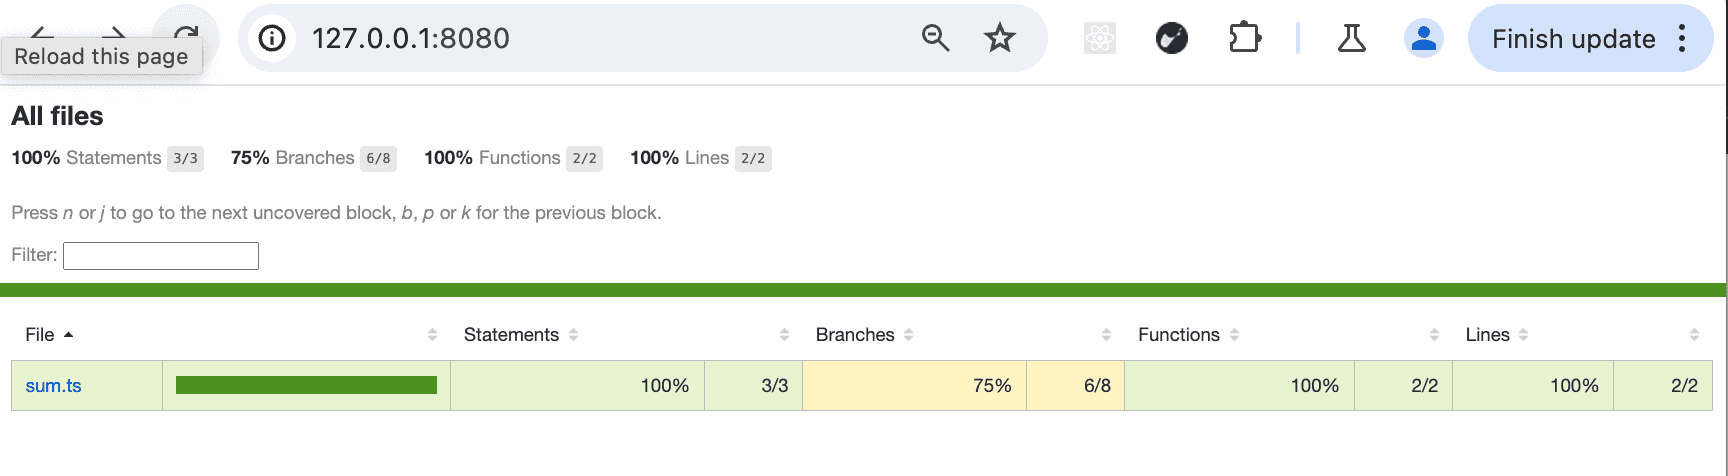
or you can run the html report with:
npm run coverage:htmlnow if you go at http://localhost:8000/ from your browser you will see in details the coverage file by file:
you can even click on a sigle file to check which part of your source code is not covered by your tests:
