So that’s when I bring on what I do for living
In lesson1 and lesson2 we saw how to use row audio in nodejs, and how to use your mic and speaker.
Today we are gonna see how to make this audio going over the internet and connect it to a mobile phone.
Make it run
To make you understand deeply what we are gonna do, I have to explain you several concept of the vonage api, but first I want to you to see this working, just to get you exited.
go there https://github.com/jurgob/conversation-api-function follow the instruction to make it work.
In short, that’s a cli command to execute some examples. Now clone this repo: https://github.com/jurgob/ws-phonecall-receive rand make it run with the cli.
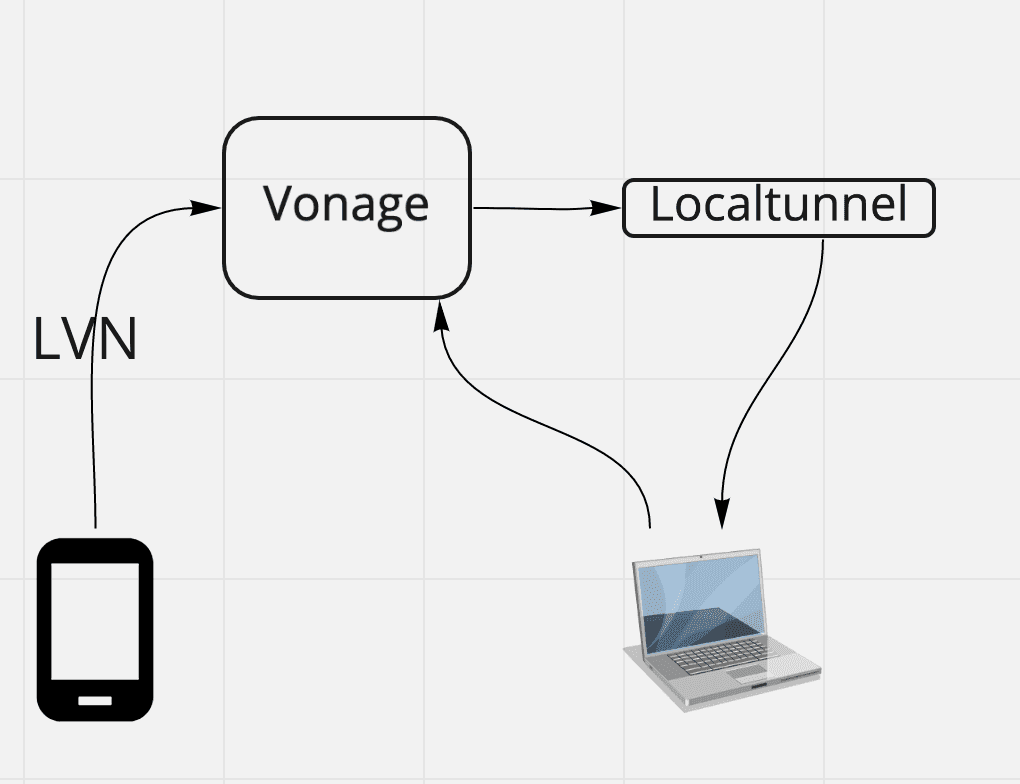
In the process you were required to buy and configure a phone number from vonage (the so-called LVN, Long Virtual Number). What you have to do now is start the ws-phonecall-receive example and after that dial the lvn from your phone.
You are gonna hear your phone audio through your computer speaker and you will be able to respond back!
Some context first
Before I explain what is going on, I need to explain what you are using.
- The Vonage Comunication API https://www.vonage.co.uk/communications-apis/apis/?icmp=l3nav_apis_novalue#Communications Are a set of api that allows you to do video, audio, send sms, IM messages and chat in an easy way
- When you work with real time api like ours, the comunication is tipical bidirectional, so you reach the api, but also the api need to be able to reach you. You typically do this adding your server address in the webhook configuration, but for doing it in your localhost, you need some trick, so to simplify this, I did the the tool called conversations-api-function.
- so again, https://github.com/jurgob/conversation-api-function is a cli tool that I did for internal usage (so don’t expect support on that), it is done so you can quickly build prototype in your laptop and test them locally (is called conversation-api-function because initially I got kind of inspired by the aws lamda functions)
- What the conversation-api-function is doing for you is just creating an application , and connecting it to your LVN.
- The application has some webhook you can configure to notify your back end every time something happen (e.g. someone is calling you). Every time you start locally your code, your laptop is exposed on the public internet and the application is updated in order to inform your laptop
Now, let’s see the code
as you notice, the first thing you do is calling the LVN. When your lvn receive a call, the voiceAnswer callback is executed. This is a simple express middelware that should return a json response. This json response should be a valid ncco. An ncco is a set of instruction you use to program your call. It exist because is much easier using the ncco than using the api and manage all the details.
In this ncco, what you are telling to the server is just to connect the caller (your phone) to a to a websocket url that We are gonna expose in this same function

your function is expoing this websocket url. look the handler route , this is executed at your example startup, and his giving you and express app you can use to add any handler you want.
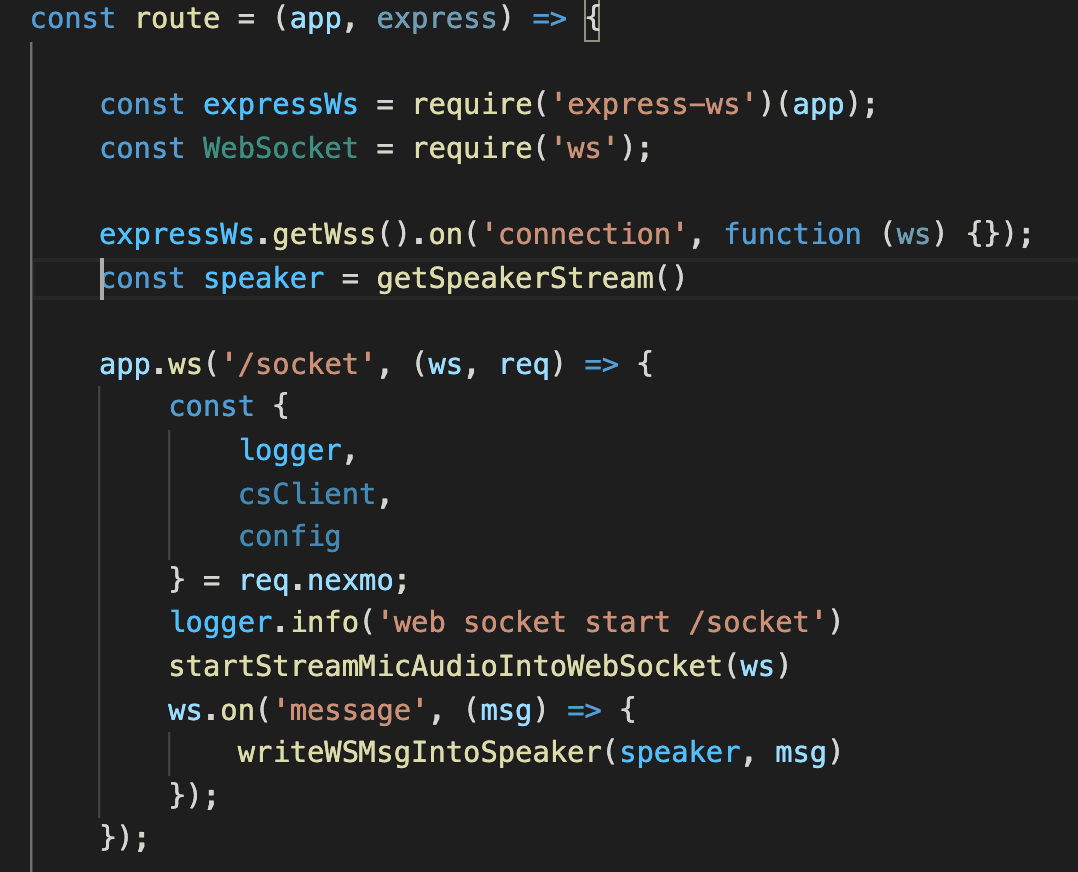
the instruction const speaker = getSpeakerStream() , which is executed at the script start up, is accessing it you your speaker.
in the line app.ws('/socket', …, I’m adding a websoket handler at the url /socket that is supposed to receive a ws stream containing the call audio.
As you can imagine, the interesting details are hidden in the getSpeakerStream() , startStreamMicAudioIntoWebSocket() and in the writeWSMsgintoSpeaker function. Let’s check them:
getSpeakerStream()
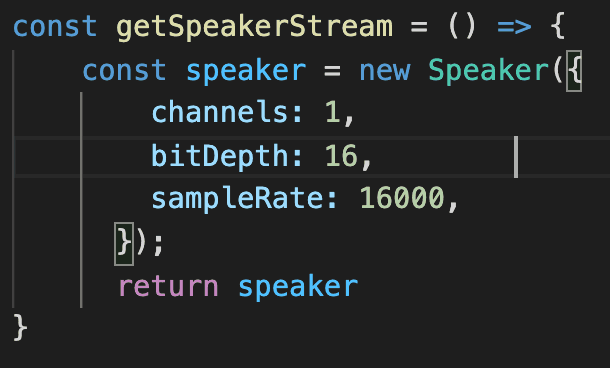
that is pretty straightforward, basically we are just getting access to the speaker same way we did in lesson1.
writeWSMsgintoSpeaker()
A lot more code here.
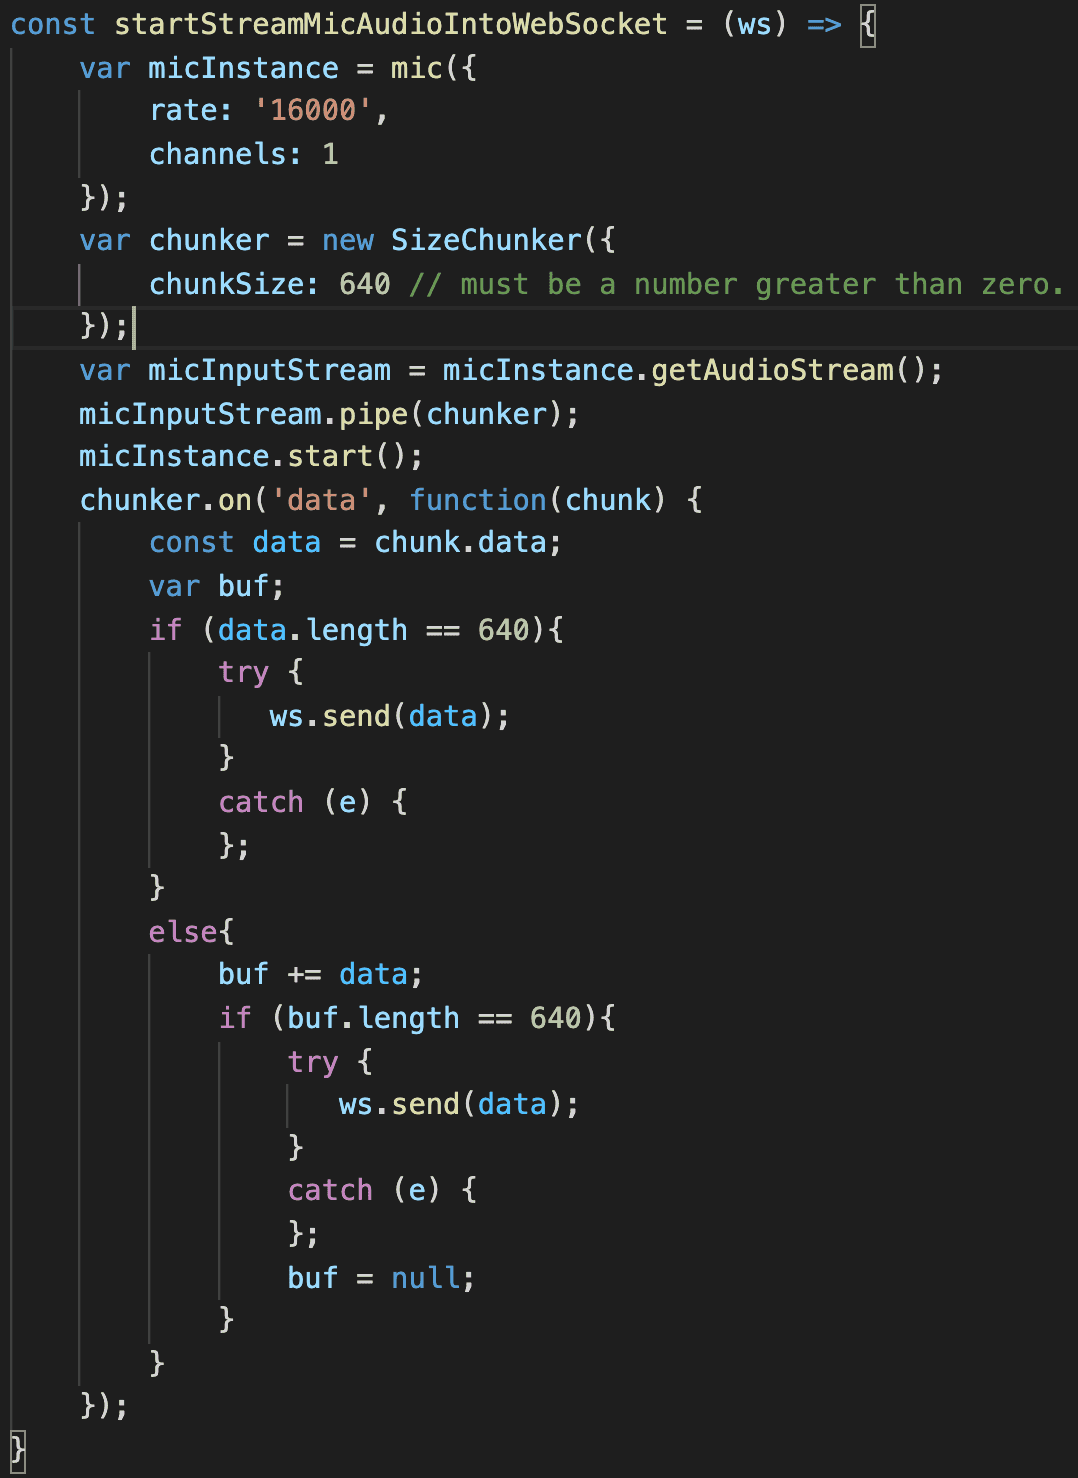
We start with something familiar from the lesson2, we are accessing the mic.
then we got:
var chunker = new SizeChunker({
  chunkSize: 640
});
micInputStream.pipe(chunker);
this is basically taking the mic audio flow and chunking it in piece of 640 bytes.
now with chunker.on('data'… we are saying that every time I’ve got ready an audio package from my mic with the size of 640 , you should send this to Vonage via websoket.
writeWSMsgIntoSpeaker()
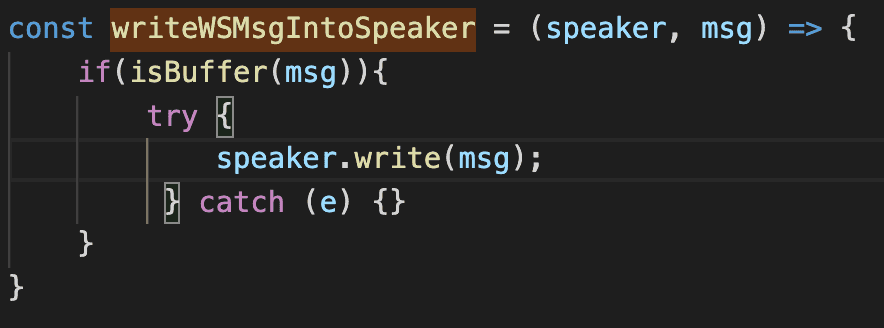
this also should be simple, we are “writing” every data package we receive from the backend in our speaker, so we can ear the voice coming from the phone. notice we are doing this only if this check pass: if(isBuffer(msg)) , that’s because audio is not the only thing Vonage is sending you via web socket but that’s the only thing you want to pass to your speaker.
That’s all Folks
It was long but we did it!
Let me know if you have any comment, feedback question!