This is gonna be a series of article teaching your how to use audio with nodejs
Click here to go to the final Github repo.
In my work at Vonage I deal with audio a lot. Despite this, I m very far from being an audio expert. I don’t work with the details or even with the media part, so I decided to do some experiment to understand it better. During those experiments, I’ve realized that is something very fun, but not very documented. There are few libraries we are gonna use written by different people that are just managing what is called “raw audio”, when I make them work together, I felt like some kind of magic was happening. In this series of article, I m gonna share with you my experience, I hope you are gonna feel the same joy I felt.
Getting started
we are gonna need to following tools installed in your laptop
- sox
- nodejs 14
Installing sox
The majority of the npm package we are gonna use rely heavily on sox which is a multi-platform cli tool to manage audio (they define it the Swiss Army knife of sound processing programs). you can download it here: http://sox.sourceforge.net/ but if you are on mac and you have brew installed, just run brew install sox . Once you have installed it, let’s verify the installation is completed (you may need to open another terminal before you do that):
run:
sox --versionThat’s what you should see:

Installing Node.js 14.
You can install Node.js in many ways, but if you are on mac, I suggest you to install `nvm` (https://github.com/nvm-sh/nvm)
is better if you read how to install nvm in the guide, but If you are on mac and you trust me, and run;
- install nvm
curl -o- [https://raw.githubusercontent.com/nvm-sh/nvm/v0.38.0/install.sh](https://raw.githubusercontent.com/nvm-sh/nvm/v0.38.0/install.sh) | bashopen a new terminal and run nvm -v``. if this is not working be sure you have in your /.zsrc/.bashrc“the following lines:or in your
export NVM_DIR="$([ -z "${XDG_CONFIG_HOME-}" ] && printf %s "${HOME}/.nvm" || printf %s "${XDG_CONFIG_HOME}/nvm")"
[ -s "$NVM_DIR/nvm.sh" ] && \. "$NVM_DIR/nvm.sh" # This loads nvm
when added, open another shell and it should work.
2. install node 14
Once nvm is installed just run
nvm install 14.15.0and then node -v to confirm you have the right version
You can probably use any other version of node, but if you want to minimize the risk of having this code not working, I suggest you to use exactly the same node.js version I’ve used.
Let’s start coding!
we are gonna do the following:
- create a new project
- install some dependencies
- access to our laptop mic, record 15 seconds of voice
- create a new project
mkdir nodejs_audio_examples
cd nodejs_audio_examples
npm initrespond to all of the questions leaving the default option.
now let’s install this amazing library to access our mic:
npm install -s micnow let’s create our first file:
touch lesson_01__enter_the_mic.jshere is the code we are gonna put there:
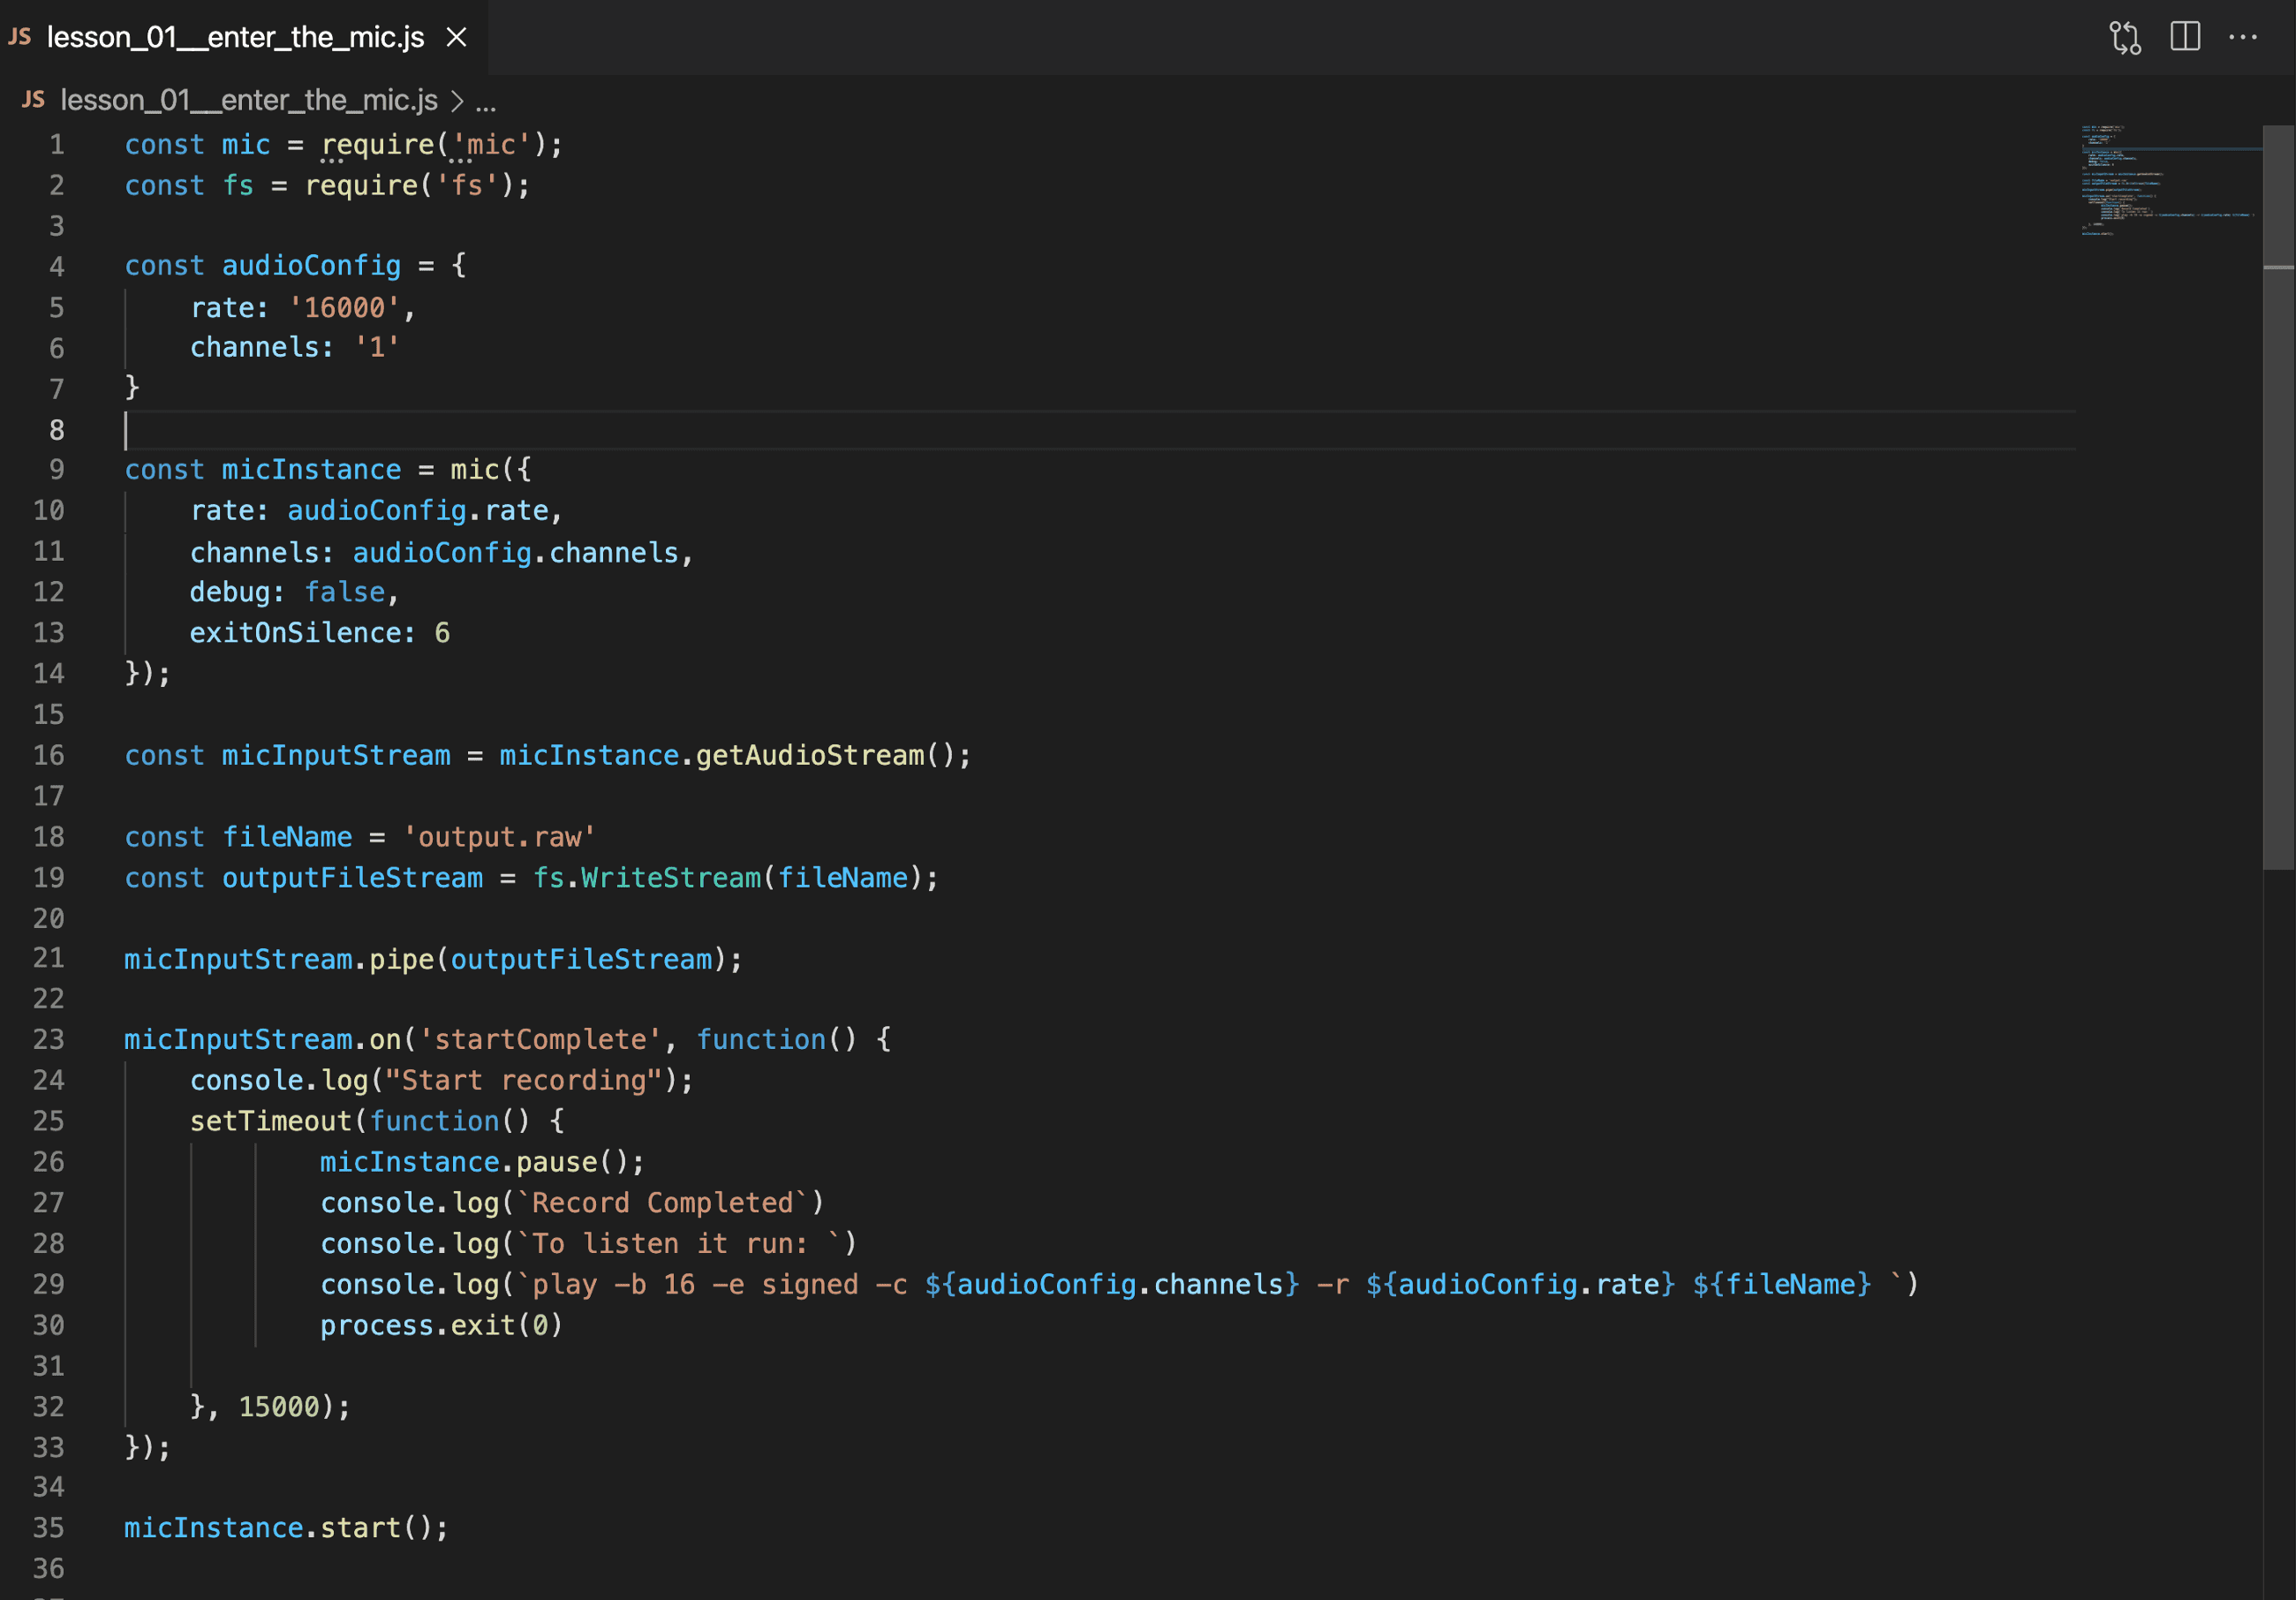
find the full code here: https://github.com/jurgob/nodejs_audio_examples/blob/main/lesson_01__enter_the_mic.js
Let’s try it
if you now run
node lesson_01__enter_the_mic.jsthe program will run, starting to record for 15 seconds. once the program is done, you will see a file output.row that you can play with the command
play -b 16 -e signed -c 1 -r 16000 output.rawhere is a screenshot of what you should see after 15 secs:

So congrats, you have successfully recorded and played your voice!.
What’s going on!?!
let’s explain some of the code.
const audioConfig = {
    rate: '16000',
    channels: '1'
}
const micInstance = mic({
rate: audioConfig.rate,
channels: audioConfig.channels,
debug: false,
exitOnSilence: 6
});with this code we are instantiating the microphone, we are instructing it to take the audio to a sample rate of 16k and 1 channel. Those params are important, because when you are gonna play the file, you need to play the audio with into the speaker you will need to specify those params and they will need to be exactly the same.
const micInputStream = micInstance.getAudioStream();const fileName = ‘output.raw’
const outputFileStream = fs.WriteStream(fileName);micInputStream.pipe(outputFileStream);This is an important bit to understand. The audio coming from the microphone is a continuous flow of data. To operate in data flow, Node.js offers you an object called Stream. Streams are everywhere in Node.js, you use them when you write/read files, you use then when you send/ receive http requests. But usually, you are using simpler library on top of streams, because it is hard to reason in terms of streams and you don’t always need.
But now the time has come, we can’t avoid using them, let’ see what those streams are.
here is the stream documentation:
Stream | Node.js v16.6.1 Documentation_Almost all Node.js applications, no matter how simple, use streams in some manner. The following is an example of using…_nodejs.org
here they are defined in this way: “A stream is an abstract interface for working with streaming data in Node.js. The stream module provides an API for implementing the stream interface.”.
There are several type of stream but we are interested in just 2 types,
- Writable Stream: streams to which data can be written
- Readable Stream: streams from which data can be read
As you can imagine, in our example, we are getting a readable stream from the microphone with micInstance.getAudioStream() , we are generating a writable stream for the file output.raw with fs.WriteStream(fileName) and finally, we are “writing” the audio coming from the microphone in the file stream, with micInputStream.pipe(outputFileStream)
next lesson: nodejs audio lesson 2: Ear your voice from your speakers